Axis P3265-LV installation guide
In this article, you will find guidance on the installation of the Axis 3265 camera.
Before starting the installation
Before you begin the installation/mounting of digital monitoring, the following steps must be completed:
Contact your support for:
Setting up an equipment group in the Tellucare account. It should be added to the correct department/zone in the hierarchy/organization where the camera will be included.
Adding the camera to the Tellucare account. Note: This is only done if Tellu is not the supplier of the camera.
Temporary access with the role of Service Manager in the Tellucare account for the department/zone in the hierarchy/organization you need access to. The duration of temporary access is often adjusted to match the scope of cameras being installed/mounted.
Camera placement
The physical location of the camera must be defined to ensure optimal working conditions for the camera. The placement should be determined based on advice from Tellu.
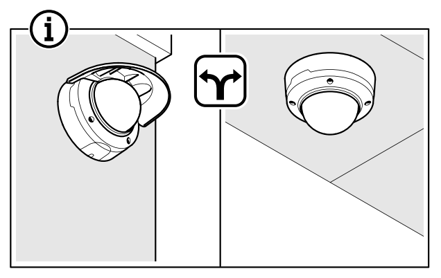
Defined coverage area for the camera
The desired camera view should be defined so that lens adjustment can be performed simultaneously with the camera installation.

Important information
When mounting, it is crucial to handle the camera in a way that prevents dirt or fingerprints, which could degrade video quality.
Clean hands: It is important to mount the camera with clean hands to avoid fingerprints and dirt on the lens.
Use gloves: Consider using suitable gloves during installation to avoid leaving fingerprints on the camera.
Camera plastic cover: Handle the camera dome by its edges, not the dome itself in front of the lens.
Camera equipment
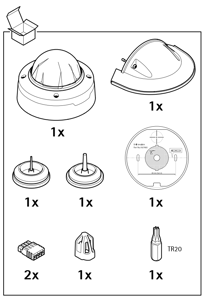
The following equipment is included with the camera:
Disassembling the camera
The camera must be disassembled before being physically mounted on a wall or ceiling.
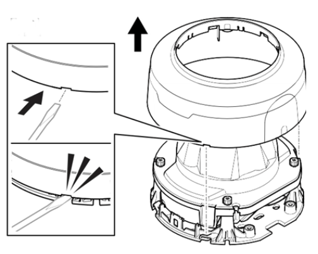
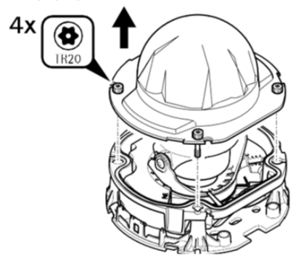
Camera cover: Remove the cover by loosening the three marked points as illustrated below.
Camera dome: Remove the camera dome by loosening the screws as illustrated below. Handle the dome without touching the lens to avoid fingerprints.
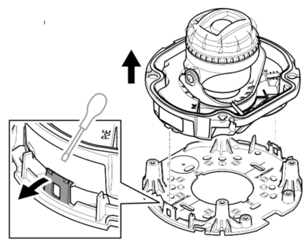
Backplate: Detach the camera from the backplate as illustrated below.
Installing the camera
The location of the camera must be determined before physical installation.
Mounting template: If needed, use the included mounting template to mark points on the wall or ceiling.
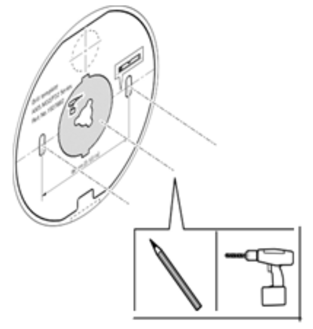
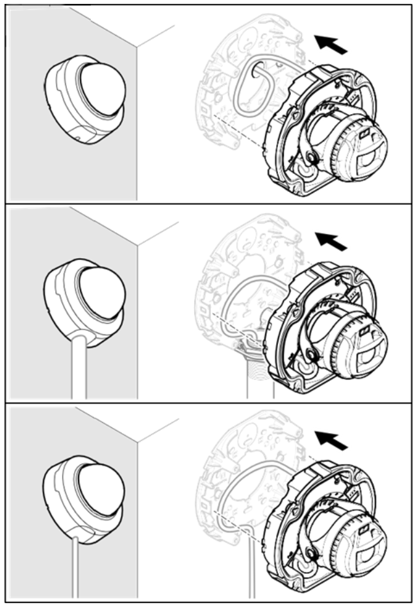
Mounting the backplate: Mount the backplate using appropriate screws.
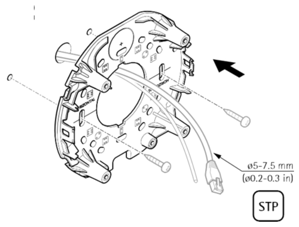
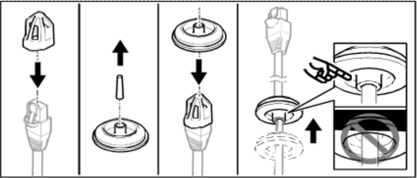
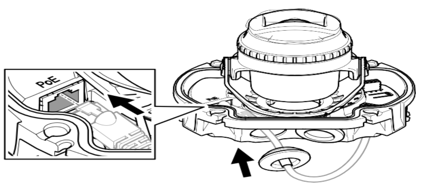
Connecting the network cable: Use the included tool to feed the network cable through the seal as illustrated below. Then, connect the network cable to the camera as illustrated below.
Attaching the camera to the backplate: Snap the camera onto the backplate as illustrated below.
Adjusting the camera view
Once the camera is mounted on the wall or ceiling, adjust the camera lens to achieve the defined video view.
Ceiling-mounted cameras: For ceiling-mounted cameras, adjusting the lens may pose challenges due to the placement of the IR sensors. Lens adjustment could result in the IR sensors being partially or fully covered by the camera cover, reducing nighttime video quality.
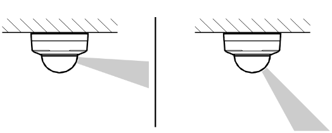
Placement of IR sensors: After adjusting the lens to the desired video view, check the placement of the IR sensors. They should not be above or partially above the circle indicated on the upper edge of the dome. The illustration below shows an example of IR sensors that are partially covered.
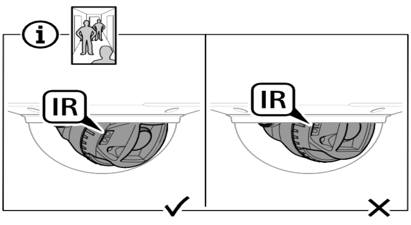
Adjusting the placement of IR sensors
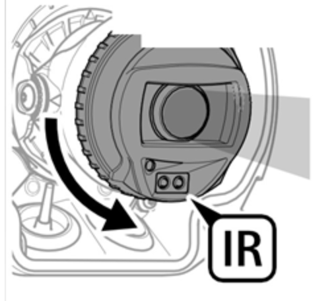
If the lens is partially or fully covered, rotate the camera lens so that the IR sensors are placed below the lens. After rotating the lens, adjust the camera orientation to ensure the video stream is correct. Additionally, verify the quality of nighttime video by darkening the room and manually activating the IR sensors. Remember to set the IR back to Auto when finished.
Installing the camera cover
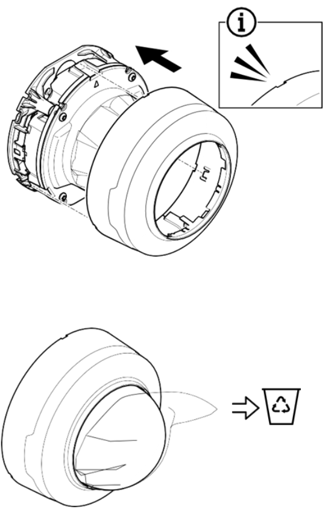
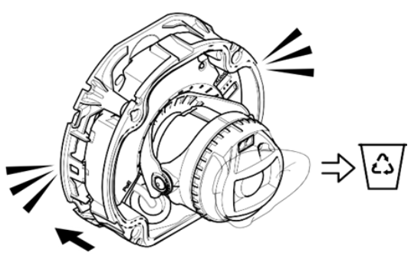
Complete the installation by mounting the camera cover as illustrated below.
